15 KiB
- Agenda
- 1. Introduction to containers & kubernetes
- 2. Exploring openshift application platform
- 3. Setting up your development environment
- 4. Deploying a ruby application
- 5. Creating a deployment pipeline for our app
- 6. Making an application serverless
Welcome to the OpenShift Ruby on Rails Workshop!
The workshop provides ruby developers an introduction to OpenShift and containers, and how these can be used to build fully automated end-to-end continuos integration and deployment pipelines for Ruby on Rails applications.
Agenda
| # | Topic | How | Time allocated | Section link |
|---|---|---|---|---|
| 1 | Introduction to containers & kubernetes | Facilitator led, group session | 10m | Link |
| 2 | Exploring openshift application platform | Facilitator led, group session | 10m | Link |
| 3 | Setting up your development environment | Individual, hands on excercise | 10m | Link |
| 4 | Deploying a ruby application | Individual, hands on excercise | 20m | Link |
| 5 | Creating a deployment pipeline | Individual, hands on excercise | 20m | Link |
| 6 | Making an application serverless | Individual, hands on excercise | 20m | Link |
1. Introduction to containers & kubernetes
Before we can get hands on with the workshop, let's make sure we have an understanding of both containers and kubernetes.
What are containers?
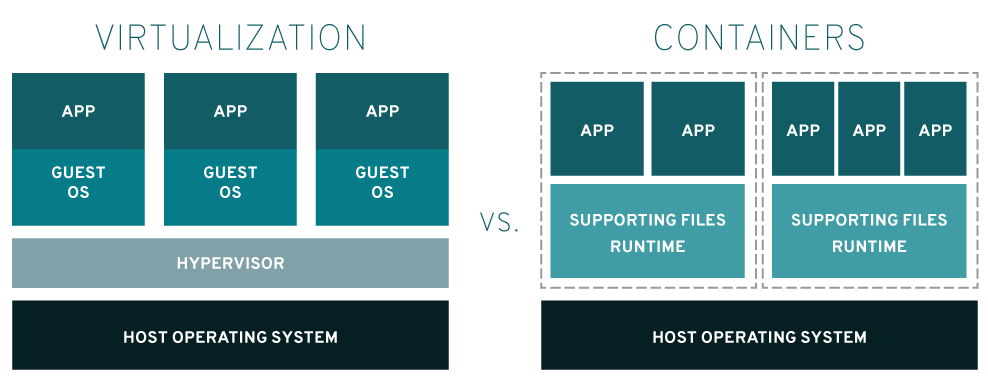
Containers are technologies that allow the packaging and isolation of applications with their entire runtime environment—all of the files necessary to run. This makes it easy to move the contained application between environments (dev, test, production, etc.) while retaining full functionality.
What does this mean? For starters, virtualization uses a hypervisor to emulate hardware, which allows multiple operating systems to run side by side. This isn’t as lightweight as using containers.
When you have finite resources with finite capabilities, you need lightweight apps that can be densely deployed. Linux containers run natively on the operating system, sharing it across all of your containers, so your apps and services stay lightweight and run swiftly in parallel.
Containers are also an important part of IT security. By building security into the container pipeline, containers stay reliable, scalable, and trusted.
You can also easily move the containerized application between public, private and hybrid cloud environments and data centers (or on-premises) with consistent behavior and functionality.
Why are containers important?
Containers help reduce conflicts between your development and operations teams by separating areas of responsibility. Developers can focus on their apps and operations teams can focus on the infrastructure. And, because containers are based on open source technology, you get the latest and greatest advancements as soon as they’re available.
Container technologies—including Podman, Skopeo, Buildah, CRI-O, Kubernetes, and Docker — help your team simplify, speed up, and orchestrate application development and deployment.
Containers share the same operating system kernel and isolate the application processes from the rest of the system so the whole thing can be moved, opened, and used across development, testing, and production configurations.
Because they are lightweight and portable, containers provide the opportunity for faster development and meeting business needs as they arise.
What is kubernetes?
Kubernetes (also known as k8s or "kube") is an open source container orchestration platform that automates many of the manual processes involved in deploying, managing, and scaling containerized applications.
You can cluster together groups of hosts running Linux® containers, and Kubernetes helps you easily and efficiently manage those clusters.
Kubernetes clusters can span hosts across on-premise, public, private, or hybrid clouds. For this reason, Kubernetes is an ideal platform for hosting cloud-native applications that require rapid scaling.
Kubernetes was originally developed and designed by engineers at Google. Google was one of the early contributors to Linux container technology.
Red Hat was one of the first companies to work with Google on Kubernetes, even prior to launch, and has become the 2nd leading contributor to the Kubernetes upstream project. Google donated the Kubernetes project to the newly formed Cloud Native Computing Foundation (CNCF) in 2015.
2. Exploring openshift application platform
Now that we have refreshed on containers and kubernetes, let's take a tour through the OpenShift application platform from the perspective of a developer.
Web console developer view
The first stop on our tour will be the Web console "Developer View". In order to move quickly with containers, developers need to be able to use the benefits of Kubernetes without being required to develop a platform engineering skillset. Taking time from development cycles to learn, install, and manage infrastructure tools is not helping get business applications to market.
Red Hat OpenShift has a specifically designed developer view so that you can make the most of the platform, without having to get bogged down learning kubernetes.
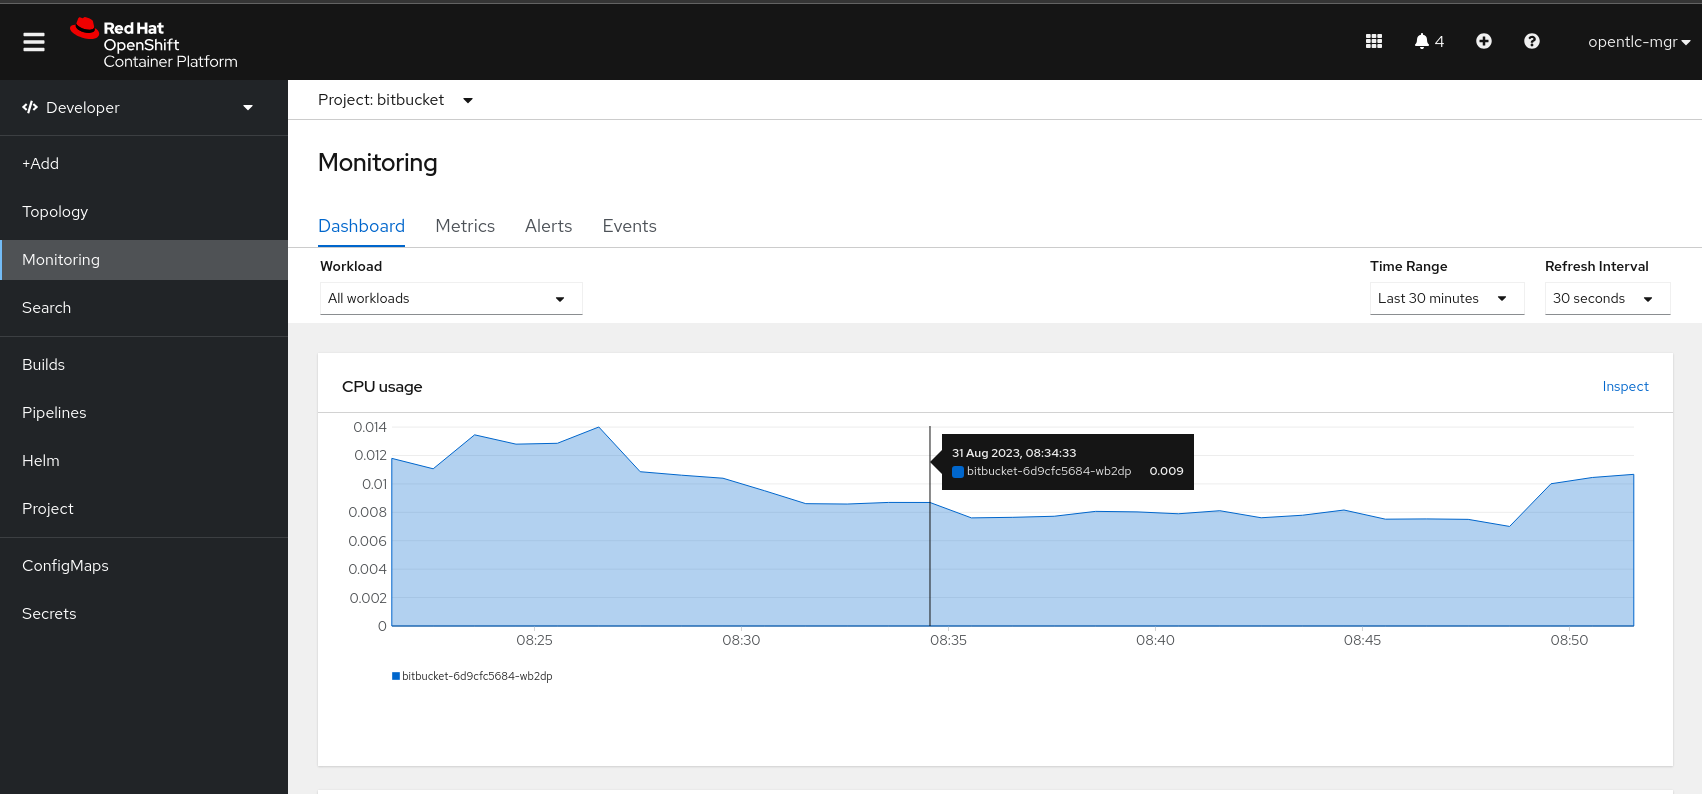
Within developer view you can see a graphical topology for your application, check application logs or observability metrics, scale applications, restart deployments, review pipelines and much more.
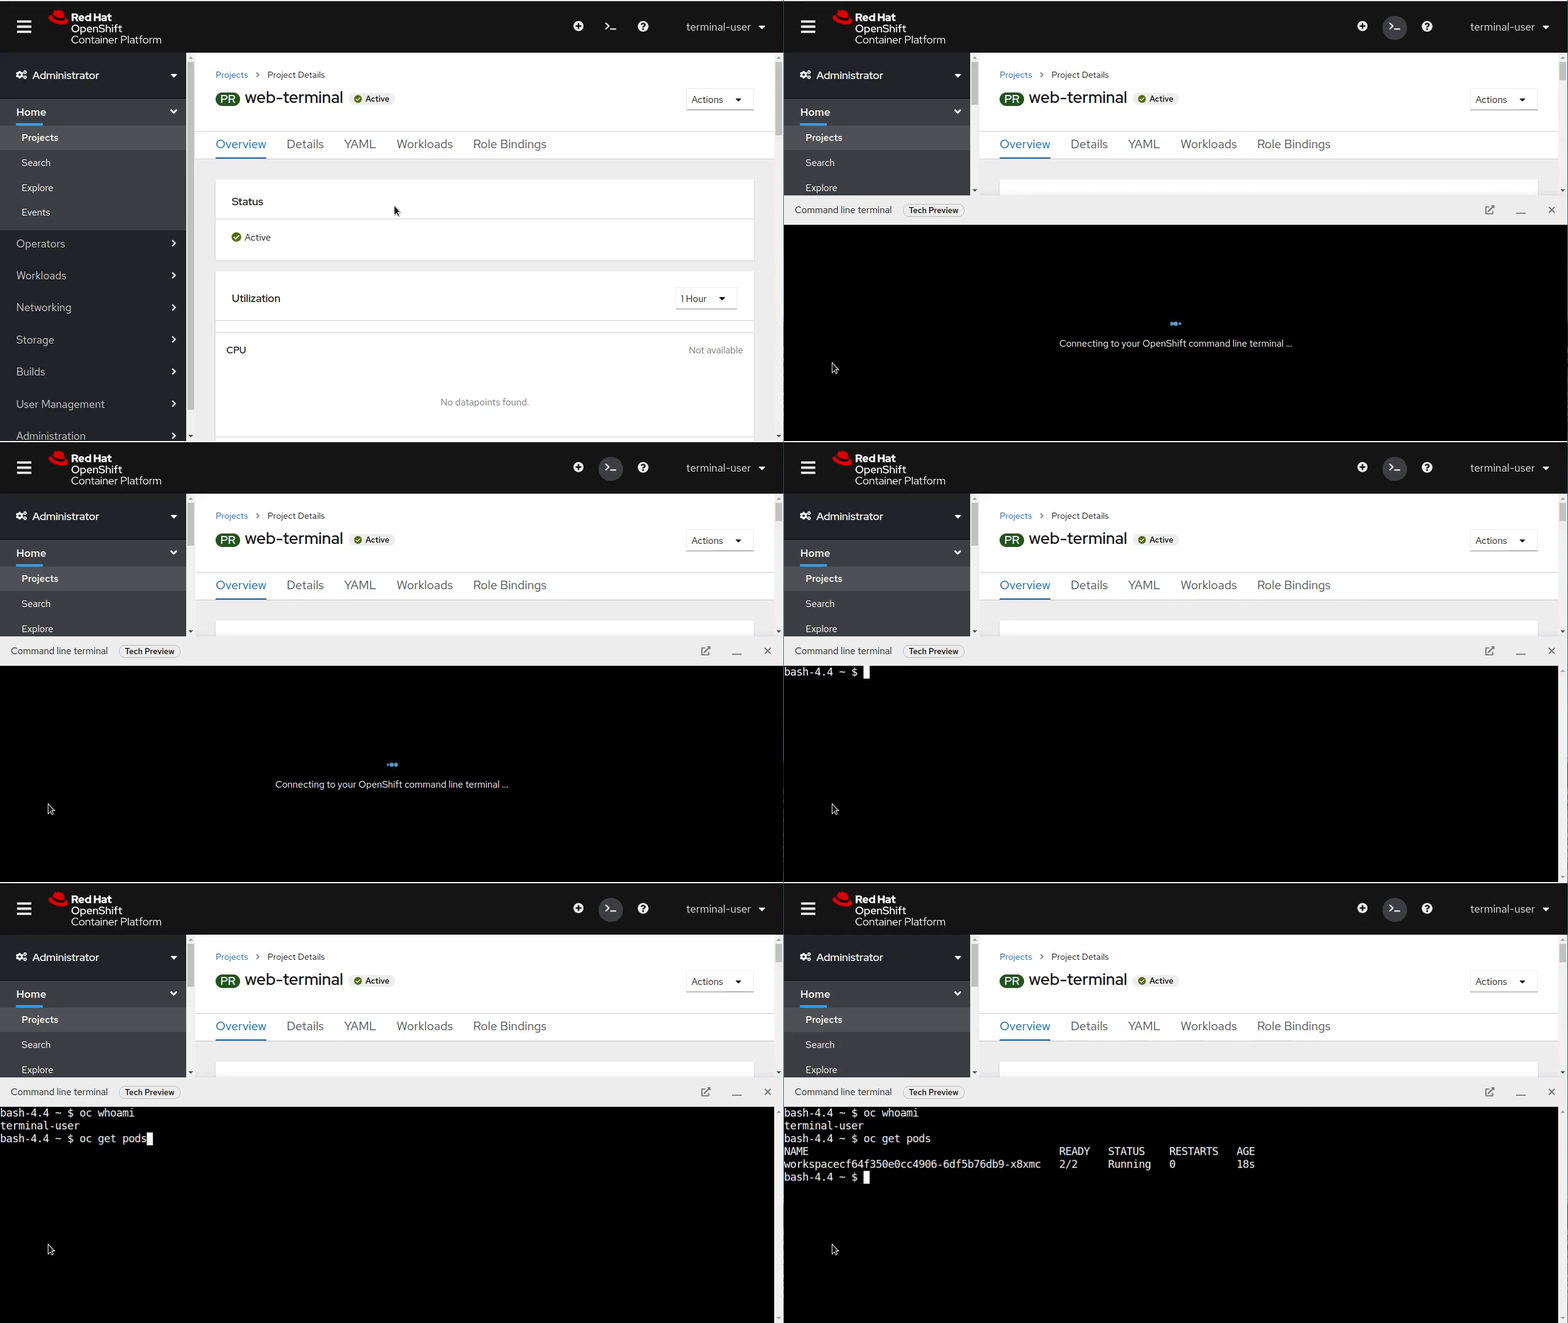
Web console terminal
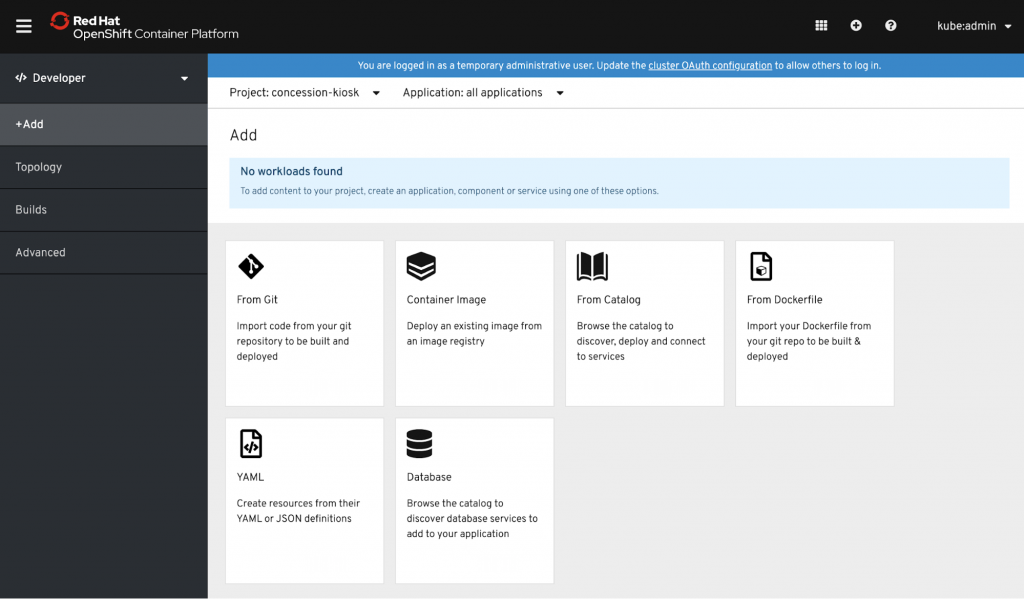
Quick add for new applications
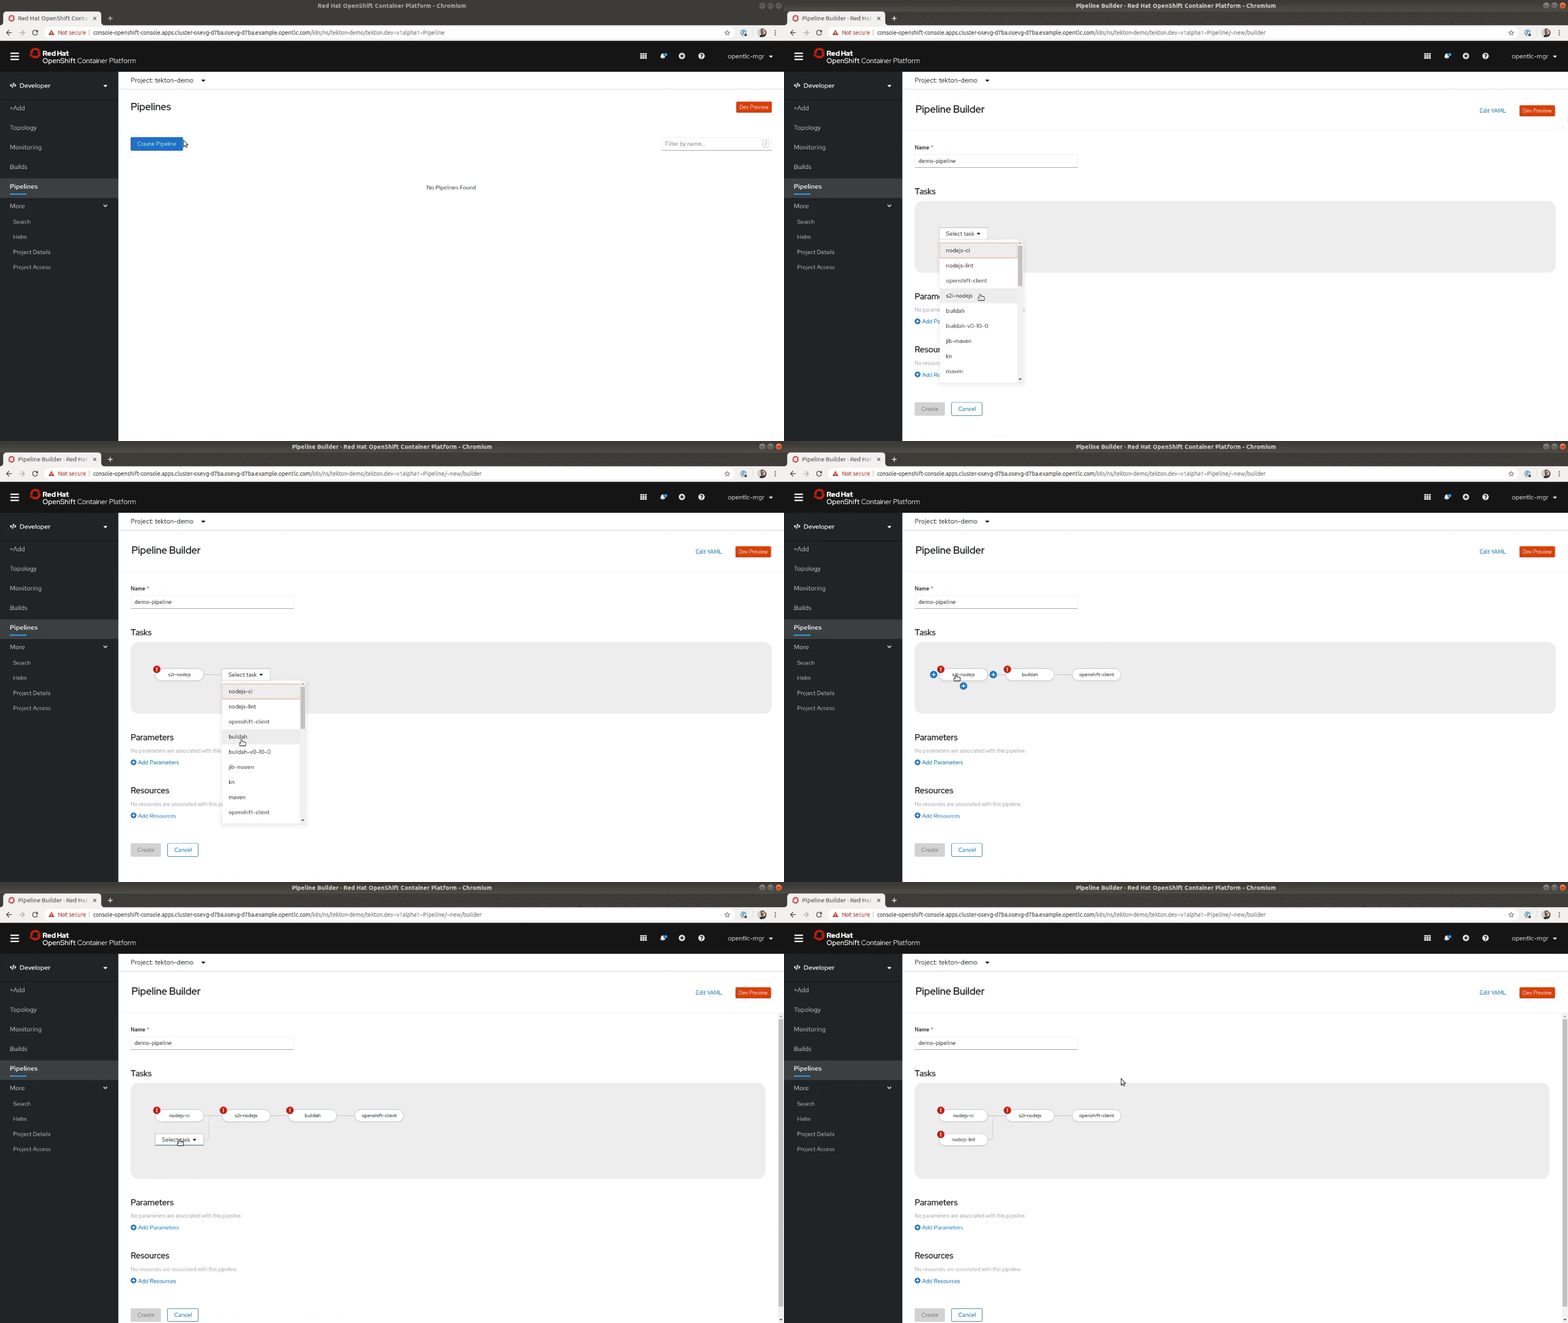
Visual pipeline builder
3. Setting up your development environment
For our first hands on excercise let's get logged into the tools we'll be using today and get familar with each.
Log into bitbucket and fork codebase
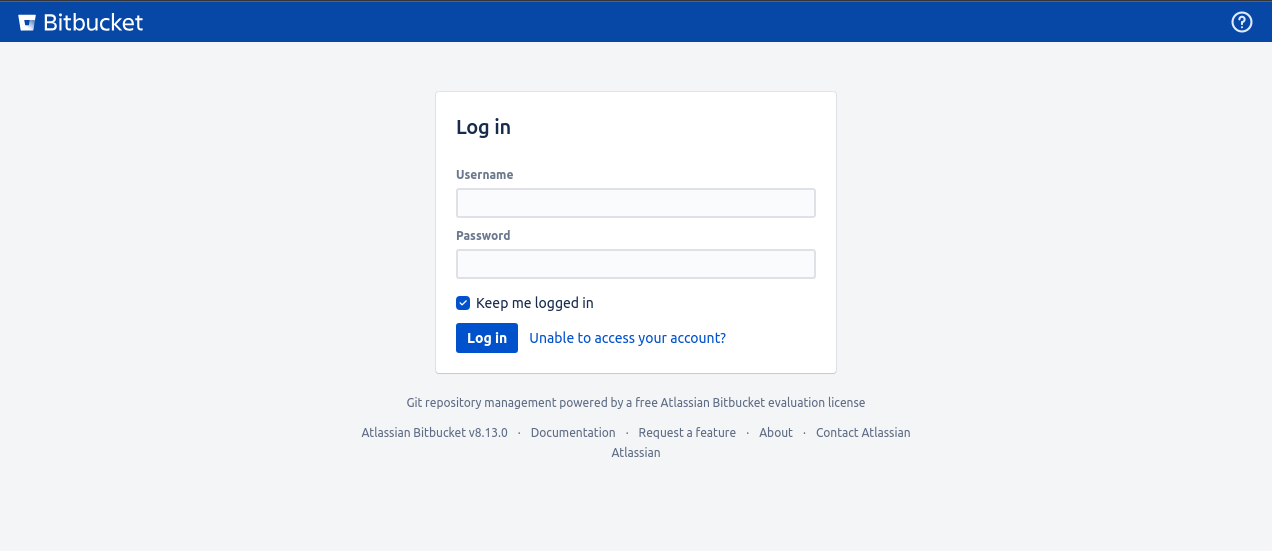
For this workshop we will be using a Bitbucket server as our git source control management tooling. The server is running on the same OpenShift cluster we will be using for the hands on excercises and can be accessed with the link below:
https://bitbucket-bitbucket.apps.rosa-zc2fk.nhwo.p1.openshiftapps.com
Use the credentials provided on the workshop slides to login.
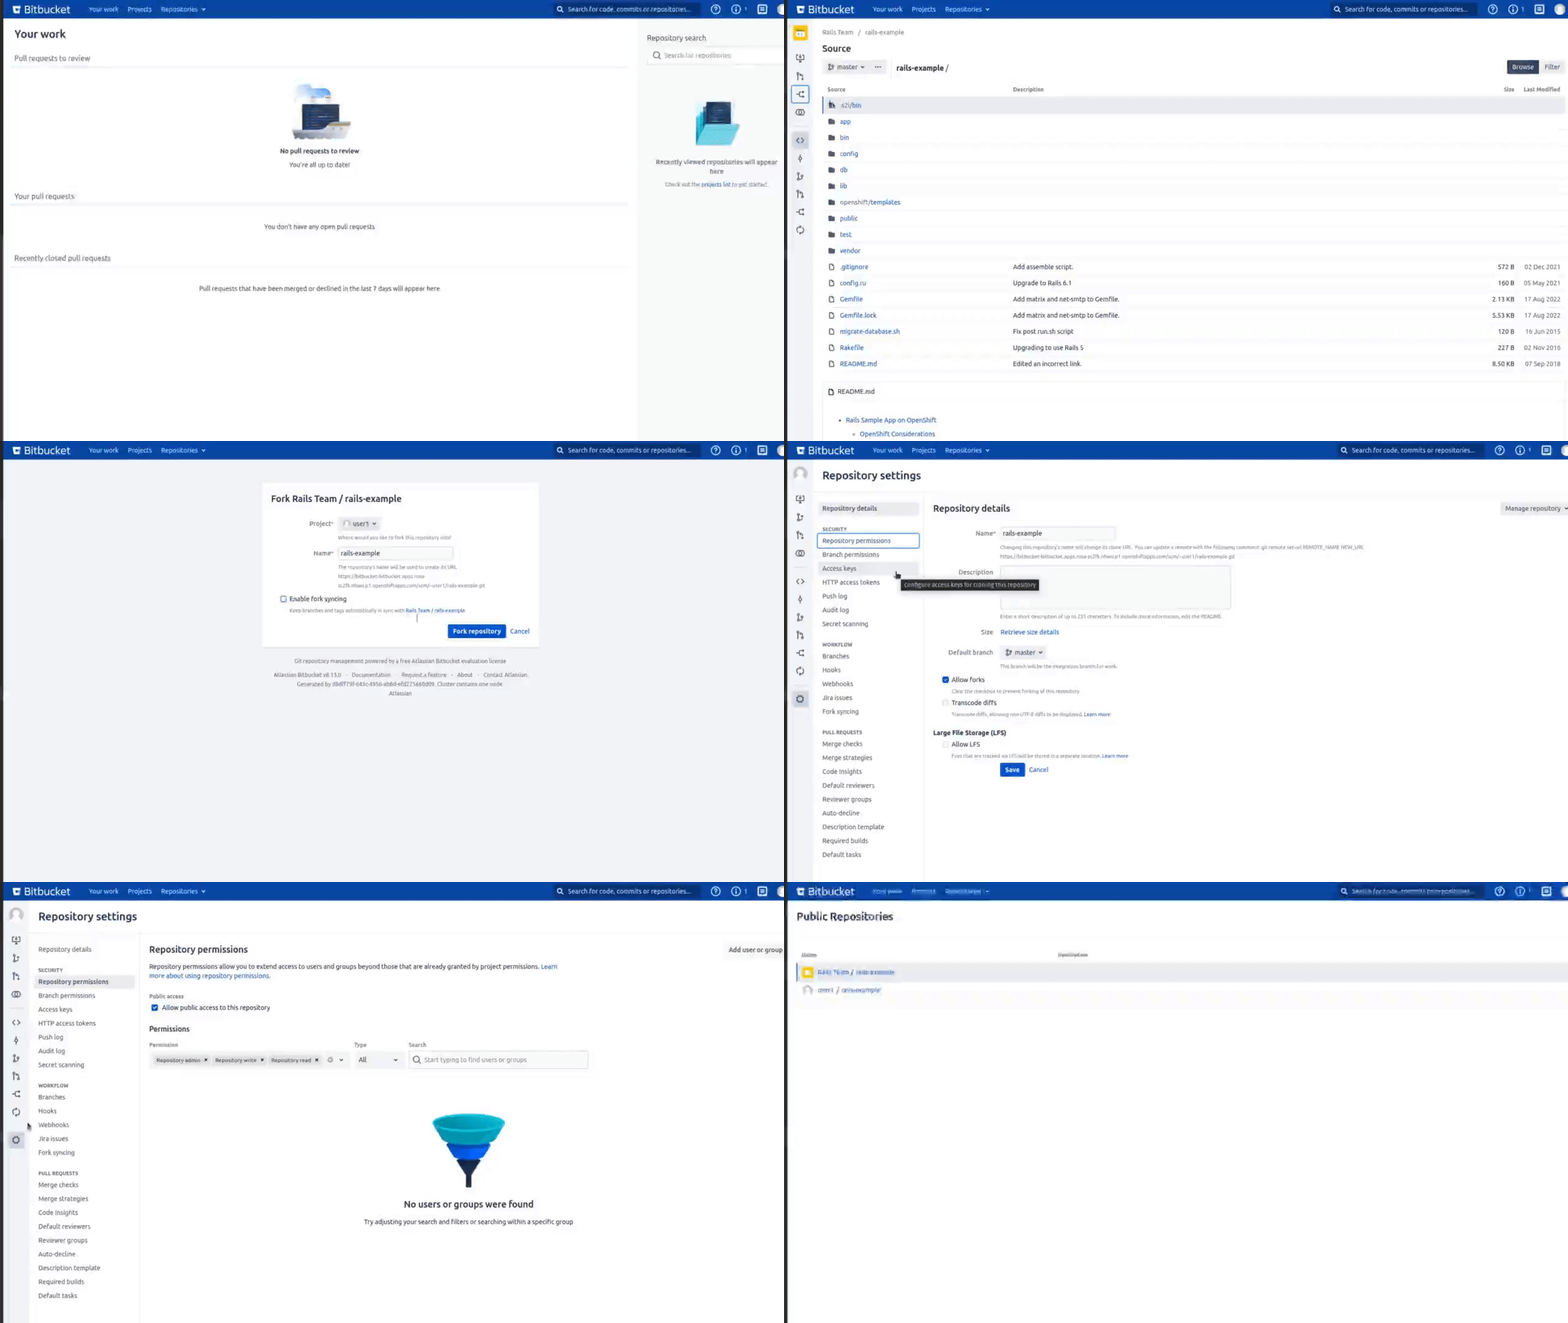
Once logged in you should be able to view and create a fork of the Rails Team/rails-example repository to your own user using this link: https://bitbucket-bitbucket.apps.rosa-zc2fk.nhwo.p1.openshiftapps.com/projects/MSD/repos/rails-example?fork
Ensure you make your fork public after creation as shown below:
Log into openshift web console
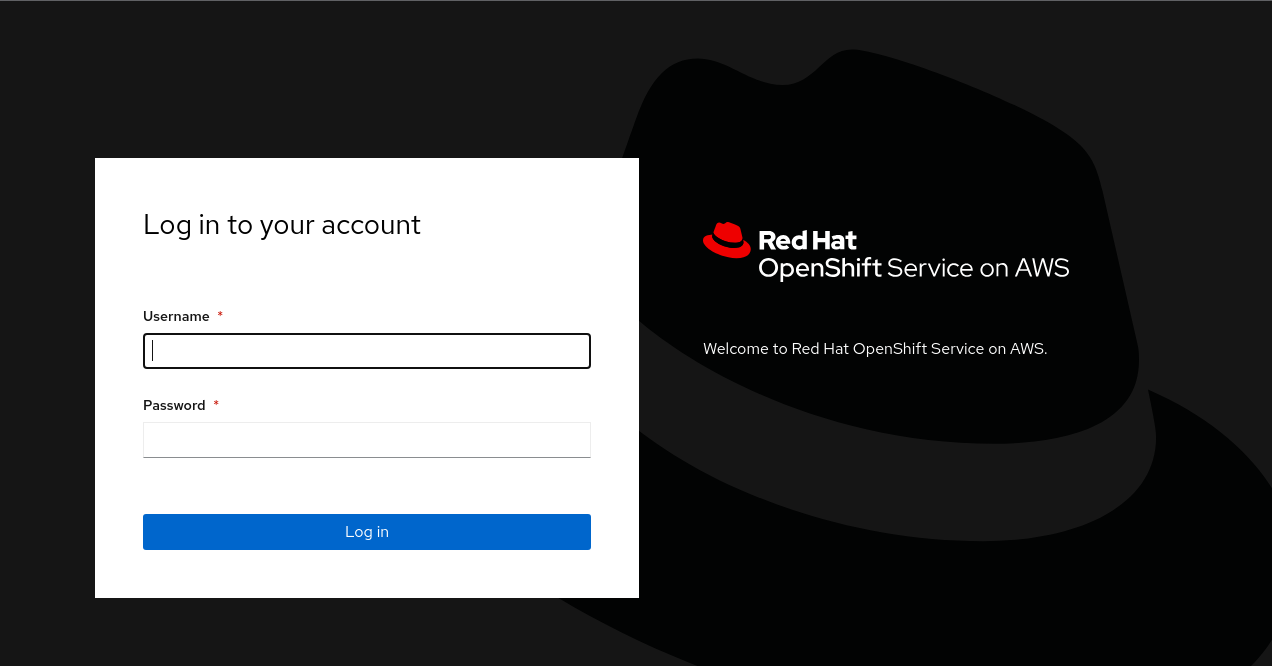
Once we have our individual code fork created let's log into the OpenShift web console using the link https://console-openshift-console.apps.rosa-zc2fk.nhwo.p1.openshiftapps.com.
Use the credentials provided on the workshop slides to login.
Once logged in, feel free to repeat the OpenShift tour we went through as a group in section two to get more comfortable with the user interface.
4. Deploying a ruby application
Now that we are logged into our environment let's move on to deplying the rails-example codebase we forked earlier, onto OpenShift. We'll do this in two different ways:
User the web interface to import from git and deploy
OpenShift's Source-to-Image (S2I) is a powerful tool that streamlines the deployment of applications by automating the build process from source code to a runnable container image.
With S2I, deploying a Ruby app becomes easy – it detects your app's dependencies, assembles the necessary runtime environment, and produces a production-ready container image. This approach not only accelerates deployment but also ensures consistency and reliability across various environments, allowing you to focus on writing code without worrying about complex deployment configurations.
- Click the
+Addbutton in developer view (or open https://console-openshift-console.apps.rosa-zc2fk.nhwo.p1.openshiftapps.com/add) - Click on the
Import from Gittile in your add menu. - Enter the repo-url for your repository fork.
- Select the
RubyS2i builder image. - Enter
rails-exampleinNamefield. - Click create button and you will be redirected to
Topologyscreen. - Click on
rails-exampleapplication to see check the progress of the build (this should take roughly 2 minutes). - Click the route once the pod is
Running, the application ui should display.
Using the command line to import from git deploy
Everything that we can do through the OpenShift web console, we can do programmatically through the oc command line utility. This includes creating a new source to image application deployment.
To save time during todays workshop we won't be setting up our local terminal to test this out, instead we will use the handy OpenShift Web Console terminal.
- Click on the web terminal
>_icon in the top right corner of the web console. - A terminal will pop up in the bottom of the window, this can sometimes take a minute or two to start.
- Copy the following command into the termuinal and press
Enter.
oc new-app --name rails-cli centos/ruby-25-centos7~<FORK_CLONE_URL>- Let's open the web console again and we should now see another application pod in our topology view!
- Click on the pod, and open the route to see the application serving traffic.
5. Creating a deployment pipeline for our app
Now that we've explored some methods for deploying a ruby application. Let's create a full pipeline for deployments. We can actually generate basic pipelines automatically with a checkbox as we use the Import from git quick add feature in the web console.
OpenShift Pipelines are based on the upstream tekton project.
For this excercise, lets build some familiarity with tekton by creating a new pipeline from scratch!
- Click on
Pipelinesin the OpenShift web console developer view. - Click on
Create>Pipelinein the top right hand corner. - Enter the name
ruby-pipeline. - Click
Add workspaceat the bottom of the page and enter nameruby-pipeline. The workspace is the shared context that will be passed between each task in the pipeline. For example, cloning source code, then testing that code in a subsequent pipeline task. - Click on
Add task, and type inclone, then selectgit-clonefromRed Hatand clickAdd. - Click on the newly added
git-clonetask and enter the clone url for the repository you forked in Bitbucket (note, ensure the Bitbucket repository is set to public in Bitbucket setttings). Then scroll down and selectruby-pipelinein the workspace dropdown. - Click the
+symbol that appears to the right of yourgit-clonetask when you hover over it. ClickAdd taskon the new block in the pipeline and enterrubyin the search. Selects2i-rubyfromRed Hatand clickAdd. - Click on the newly added
s2i-rubytask and enterimage-registry.openshift-image-registry.svc:5000/userX/ruby-pipeline-appas theIMAGEfield, making sure to replace the X your user number. Scroll down and selectruby-pipelinein the workspace dropdown. - Click the
+symbol that appears to the right of yours2i-rubytask when you hover over it. ClickAdd taskon the new block in the pipeline and enteropenshift-clientfromRed Hatand clickAdd. - Click on the newly added
openshift-clienttask. Update the display name todeploy, then set thescriptfield tooc new-app --image image-registry.openshift-image-registry.svc:5000/userX/ruby-pipeline-app(remember to update X with your user number). Finally, clickCreate.
6. Making an application serverless
So we've just deployed some applications to OpenShift, how about we make one of the a serverless application? This is very simple to do thanks to OpenShift Serverless.
- Right click on your first deployment
rails-exampleand clickMake serverless. - Change the
Namefield torails-example-serverless. - Click
Create.
- Notice how our application automatically scales to zero after a minute of no traffic? These scaling options can be fully configured as required for each application.
- Try visiting the route after the application scales to zero and notice how the application automatically scales back up to handle the traffic.

