5.1 KiB
Open broadcast studio setup
I use Open Broadcast Studio in Linux Mint to manage my audio and video devices for virtual meetings which drastically improves my video and audio quality. This page documents how I set up and the configuration I use.
Note: For audio hardware I generally rely on Blue Yeti Nano microphones and Sony WH-1000XM bluetooth headphones.
Install obs
To get started install obs including all dependencies required using the steps below:
# Install dependencies first
sudo apt install --yes ffmpeg v4l2loopback-dkms

# Load the v4l2loopback module for virtual cam
sudo modprobe v4l2loopback exclusive_caps=1

# Add package repository
sudo add-apt-repository ppa:obsproject/obs-studio
# Install open broadcast studio
sudo apt update && sudo apt install --yes obs-studioInstall plugins
Before we get underway we also install the StreamFX plugin for OBS so we can blur backgrounds without a greenscreen. Follow the steps below to install the plugin:
# Ensure the plugin directory exists
mkdir --parents ~/.config/obs-studio && cd ~/.config/obs-studio

# Download latest plugin release archive from github
curl -s https://api.github.com/repos/Xaymar/obs-StreamFX/releases/latest \
  | grep "browser_download_url.*zip" \
  | grep "ubuntu" \
  | grep -v "clang" \
  | cut -d : -f 2,3 \
  | tr -d \" \
  | wget -O streamfx.zip -i -

# Extract the archive then remove it
unzip streamfx.zip && rm streamfx.zip
Setup virtual audio devices
To control improve the quality of our audio we use a virtual audio output device, this allows us to take raw audio input from a microphone, apply filters and enhancements in obs, then output the enhanced audio to the virtual meeting software as a virtual microphone.
# Create the virtual speaker
pactl load-module module-null-sink sink_name=Source sink_properties=device.description=VirtualSpeaker

# Create the virtual microphone
pactl load-module module-virtual-source source_name=VirtualMic master=Source.monitor source_properties=device.description=VirtualMic
The code snippet above sets up virtual audio devices for our current session only with pactl, if we restart our machine or session those devices will no longer exist.
To make it permanent we need to save the configuration to a file in our home directory.
# Ensure required directory exists
mkdir --parents ~/.config/pulse

# Create configuration file
echo ".include /etc/pulse/default.pa" > ~/.config/pulse/default.pa
echo "load-module module-null-sink sink_name=Source sink_properties=device.description=VirtualSpeaker" >> ~/.config/pulse/default.pa
echo "load-module module-virtual-source source_name=VirtualMic master=Source.monitor source_properties=device.description=VirtualMic" >> ~/.config/pulse/default.pa
If all devices created successfully you should see them listed after running the code block below:
pacmd list-modules | grep -i "VirtualSpeaker"
pacmd list-modules | grep -i "VirtualMic"
argument: <sink_name=Source sink_properties=device.description=VirtualSpeaker> argument: <source_name=VirtualMic master=Source.monitor source_properties=device.description=VirtualMic>
Launch obs
Once obs is installed we can launch it with the command below. The setup wizard should open and you should see an option to optimize your configuration for using the Virtual Camera.
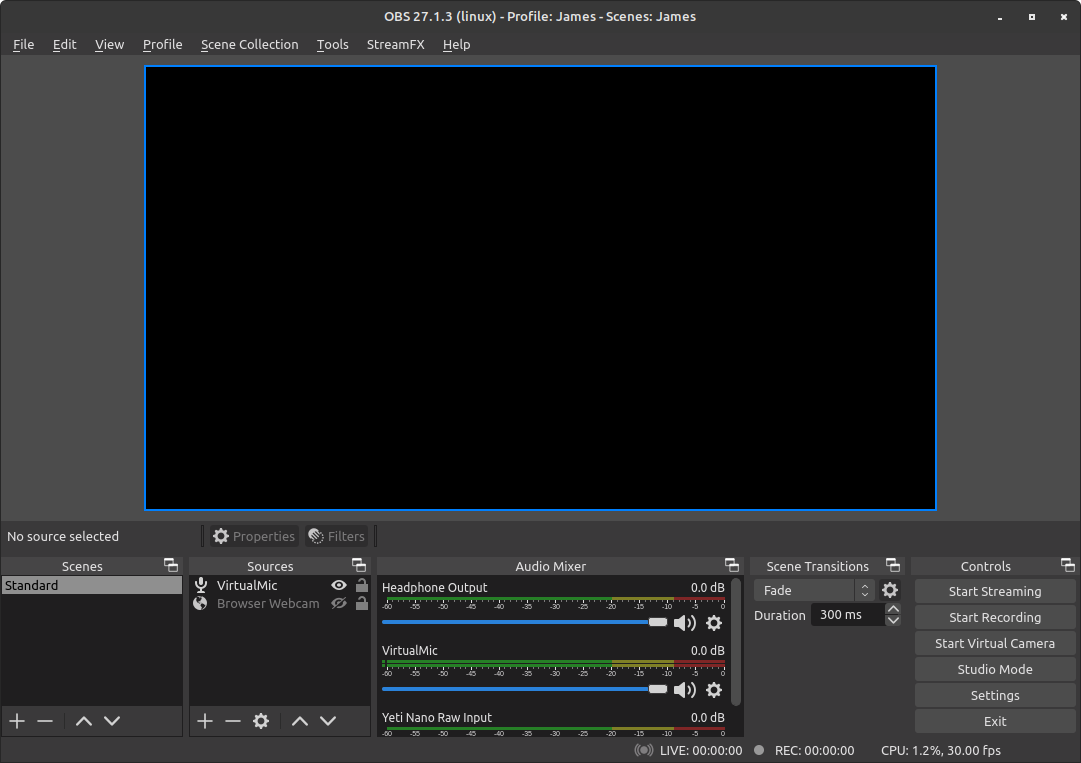
If you see that option, select it; once you get to the main OBS Studio screen, you should now see a button in the bottom right, "Start Virtual Camera".
obs&Configure obs scene
Our final step to get up and running is to restore our "Profile" and "Scene Collection" via the OBS Profile > Import and Scene Collection > Import menu options, using the profile.ini and scene.json files included in this repository.
You can use the snippet below to check the contents of the files.
# Show contents of profile ini file
cat ~/Documents/tooling/streaming/basic.ini

# Show contents of scene collection json
cat ~/Documents/tooling/streaming/scene.json | jq
With the imports done you may need to revist the Profile and Scene Collection menus to ensure the right profile and scene collection are now selected. Once finished it should look like the image below:
Congratulations, you should now have a robust obs configuration in place for video calling! :)
